


Have you ever dreamed of a low-maintenance water feature that won't run up your electricity bill, or a simple way to provide fresh water circulation in your pond or birdbath? If so, solar water pumps might be the ideal solution. Powered by sunlight instead of an electrical outlet, these pumps are both eco-friendly and economical. But setting one up for the first time can feel a bit intimidating, especially if you are not used to handling solar panels or piping systems. The following guide will take you through the necessary steps in installing Poposoap solar water pumps and ensure everything-from panel placement to pump connections-goes as smoothly as possible. By the time you are done, you will have a reliable and energy-saving installation that effectively enhances your outdoor area.
Gather Tools and Materials

Before getting started, it's best to gather all the things you will possibly need for a proper Poposoap solar water pump installation. Having all at hand will save you quite a lot of time and even reduce the probability of forgetting anything important.
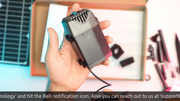
· Poposoap Solar Water pump Kit: Normally the kit will consist of a photovoltaic panel, the pumping unit itself, and connectors or hoses included in your model.
· Mounting Hardware: Brackets or stakes for securing the solar panel in place.
· Screwdriver / Drill: For attaching brackets if needed.
· Water Tubing: If you plan to extend the water flow beyond the standard pump extension, you will need water tubing.
· Pliers or Adjustable Wrench: These are handy in tightening or loosening any clamps or fittings.
· Level: A level makes sure that the solar panel and pump are correctly aligned to avoid leaks or irregular water flow.
· Measuring Tape: A measuring tape is a must for strategizing the layout of pipes or tubing runs.
With these items ready, you’ll be set for a straightforward, step-by-step installation.
Planning Your Layout
1.Determine Your Water Source and Output
First, determine the source of your water and where you want it to go. Is it for a small birdbath or perhaps a fountain, or larger, for any type of pond system? The definition will ease the determination of the correct place for putting Poposoap solar water pumps. You have to measure your distance between pump and solar panel placement for assured adequacy by the included wire or extension.
2.Sun Exposure Be assured
Solar pumps are just so beautifully stunning in themselves—but also vulnerable to sun exposure. Choose a spot with direct sunlight for at least four to six hours of the day, preferably midday sun. Full or partial shade and other obstructive elements, such as those caused by a fence, taller plants, and other structures, would bring it down. If your yard or garden is in shade frequently, get a flexible mount that you can adjust as sun patterns change throughout the year.
Positioning of the Solar Panel

1.Mounting Options
Poposoap generally provides two ways to position your solar panel:
· Ground Stake: This is good for gardens having soft soil where you can simply push a stake into the ground at an optimal angle.
· Wall or Fence Mount: Ideal for a courtyard or patio, in which one can attach a bracket securely to a wood, concrete, or brick.
For either option, ensure the panel faces the sun as directly as possible. In the Northern Hemisphere, that usually means tilting the panel southward at an angle close to your latitude. Simple adjustments can be made with a bracket or by repositioning a stake if you’re not generating enough power.
2.Securing the Panel
· Mark the Spot: Put tape or make a mark using a pencil for the precise position where your screw or stake sits.
· Attach Brackets (If Applicable): When installing on a wall, pre-drill pilot holes first and then screw them in. Ensure the bracket is horizontal so it will not become misplaced later.
· Insert the Stake: For inserting in ground, insert it down to the point of being held firmly. For soft, wet ground, insertion will be simpler.
· Angle of Adjustment: Note the tilt by seeing how much daylight the panel receives during the day. A slight adjustment can greatly improve its performance.
Installation of the Pump

1.Unpacking and Inspection
Your Poposoap solar water pump kit could come with a small submersible pump and adapters. Remove them from the box gently and check them for damage or missing pieces. If they seem to be in good condition, do a quick dry fit to check how the parts fit together.
2.Attaching Pump to Tubing
For a simple fountain or birdbath, you may place the pump directly into the water with little tubing. If, however, you plan to create a more complex arrangement, such as diversions of water from one location to another—you will need to add some piping or flexible hose.
· Sliding the Hose over the pump Outlet: First, ensure that you have a spare hose which fits snugly onto the pump outlet.
· Clamp to Prevent Leaks: One of the hose clamps can be used to prevent leaks, but do not tighten too much, as this will crack the plastic fitting on your pump.
· Test Length: Your tubing should be the correct length to get to the desired output point without losing water pressure. Cut it if it is longer.
3. Immersing the Pump
It will be placed according to the design type, but place the pump in the lower area of your water feature, such as the deepest part of a pond or bottom of a birdbath. Have it fully submerged to avoid running the pump dry. Despite their small size, these pumps are strong and thus must have water level above the intake of the pump.
Wiring and Power Connection

1.Hook up to Solar Panel
The majority of Poposoap solar water pumps feature a weatherproof plug for connecting the pump to the solar panel. Carefully align the pins and then secure any locking ring or gasket. Make sure the cable is not kinked and is untangled.
2.Cable Management
Clip or zip tie the cable along fence lines or other discreet edges in the garden to avoid tripping over it. If the design of your garden requires the cable to be slightly buried, then shallowly dig a trench and cover with soil or mulch, making sure not to damage the insulation.
Maintaining Your Solar Water Pumps
1. Regular Cleaning
To maintain your Poposoap solar water pumps in working condition, periodically remove the pump from the water feature and sweep away any algae or debris that has accumulated on it. Clean out the nozzle and inspect the impeller for blockages. This simple practice will prevent clogging and extend the life of your pumps.
2. Seasonal Considerations
In cold weather, freezing temperatures can lead to cracking of the pump or tubing. Drain the pump and store it indoors, or move it to an area where water will not freeze hard, during freezing weather. Insulated or heated birdbaths and piping systems can be employed for year-round use.
3.Panel Maintenance
Clean the surface of your solar panels periodically with a soft, damp cloth to ensure they are clear of dust, leaves, or bird droppings. Dirt as thin as a layer of dust can cut efficiency. Check the mounting brackets or stakes for security and adjust the angle of your solar panels with the seasons as necessary.
Conclusion
Installation of Poposoap solar water pumps involves planning, placement, and a smidgeon of maintenance. With your system up and running, you'll get the gentle babbling brook sound you were looking for-without adding an electric bill. The beauty this could bring to your garden or pond can be accentuated when birds and other wildlife also discover this new amenity for a drink and quick bath.
By paying extra attention to the placement of panels, securing the connections, and periodic monitoring of water flow, you will have a durable, efficient pump system that harnesses as much energy from the sun as possible. Solar pumps are widely used by eco-friendly homeowners and gardeners on the go because of fewer wires and reduced energy consumption. With this simplified method, you are en route to an outdoor haven that is not only appealingly beautiful but also a contributing factor to our beloved Earth.

In this article, we’ll delve into how a solar-powered floating fountain can transform different home waterscapes—f...

In this article, we'll explore some of the inventive applications for these pumps—everything from bird baths to ir...

In this article, here, we are presenting you to the basic features of the Poposoap solar powered water fountain, e...

In this article, we’ll explore the most common problems that can arise with solar water pumps—such as the pu...

In this article, we’ll explore why a good circulation system is crucial for pond health, how to curb algae growth,...

In this article, we will delve into what to do with your fountain during the coldest months-from equipment removal...