Required Materials
Before starting construction, prepare the following materials:
Basic materials: plant tray, wire mesh (pet screen wire), 3 or 4 inch PVC pipe, 5-gallon bucket, concrete (plant tray requires about 90 pounds of a bag of fast-hardening cement, and 5-gallon bucket requires about half a bag to 3/4 bag).
Tools and accessories: solar water pump (12 watts, with dry-run protection, adjustable pumping strength, equipped with foam filter), hot glue gun and glue stick, cutting tool, safety equipment (goggles, etc.), level, black volcanic stone (or other suitable gravel), rubber hose (for pool bottom and net protection), cable ties, scissors, cups, brushes, fast-setting concrete and masonry high-gloss sealant.
Production Steps
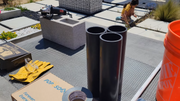
Prepare PVC pipe
Use a cutting tool to cut 4-inch long sections from the PVC pipe. Be sure to wear eye protection when cutting and tie up long hair to ensure safe operation. If the PVC pipe is hard, one person can support it while the other cuts it.
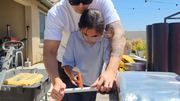
Installing and fixing the PVC pipe
Glue the cut PVC pipe to the location where the water feature is to be placed (such as the bottom center of a 5-gallon bucket or other suitable mold), use a hot glue gun to stick it, and then wrap it with tape to fix it, so that the PVC pipe is more stable and prevents it from shifting in subsequent operations.

Building a PVC pipe frame (optional)
To reduce the amount of concrete and reduce the overall weight, you can use three PVC pipes to build an opening structure that allows the fountain hose to pass through. Place the three PVC pipes evenly in the mold, adjust the position, and fix the connection points between each other with a hot glue gun.
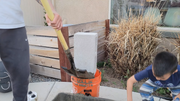
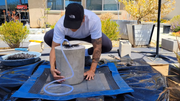
Prepare the mold
Place the PVC pipe assembly in a 5-gallon bucket and make sure it is in the center. Apply oil, such as motor oil, to the mold to make it smooth and easy to demold the concrete later.
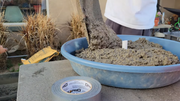
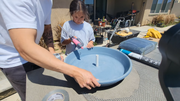
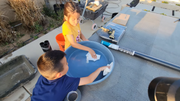
Pour the concrete
Pour the prepared concrete into the mold (5-gallon bucket). Bubbles may form during the process, but don't worry about overflow. If you use a plant tray, be aware that it uses more concrete.

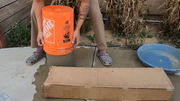
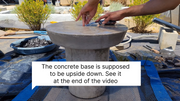
Wait for drying and processing
Let the concrete dry naturally and check the drying condition the next day. If the concrete is not fully cured, it may cause problems if it is sanded. For example, in this production, the top layer was sanded to expose the aggregate, but it failed because the concrete was not cured. After 4 days, gently tap the bottom of the bucket to use the concrete's own weight and knocking force to demold it smoothly. If you are not satisfied with the surface texture of the concrete, you can add some cement to the surface to adjust it.
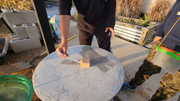
Seal the concrete
Use fast-curing concrete and masonry high-gloss sealer, pour it into a cup, and apply it evenly to the concrete surface with a brush to ensure full coverage, increase beauty and durability.
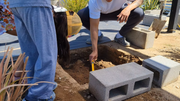
Site preparation
Determine the location for the water feature, level the ground with a level, and ensure that the water feature is placed stably.
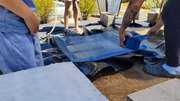
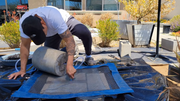
Lay rubber hose and wire mesh
Lay the rubber hose at the bottom of the waterscape to protect and buffer. Cover the wire mesh on the rubber hose and cut the size of the wire mesh according to actual needs to make it fit the area where the waterscape is placed.
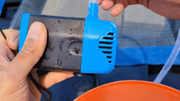
Install the solar water pump and filter
Install the foam filter of the solar water pump at the water inlet of the water pump to prevent impurities from entering the water pump and affecting its normal operation. Place the water pump in the pre-reserved position at the bottom of the waterscape to ensure that the water pump is placed stably. Connect the cable between the water pump and the solar panel, and make sure the connection is firm to avoid loosening.
Connect the water pipe and adjust the pumping intensity
Connect one end of the water pipe to the water outlet of the water pump, and the other end passes through the previously built PVC pipe frame and extends to the surface of the waterscape. Adjust the pumping intensity adjustment knob on the water pump to adjust the water flow according to actual needs. During the initial debugging, you can first reduce the pumping intensity, observe the water flow effect, and then gradually adjust it to the appropriate intensity.
Fix the water pipe (optional)
To prevent the water pipe from loosening or falling off, use a cable tie to fix the water pipe to the surrounding structure (such as a PVC pipe frame or wire mesh).
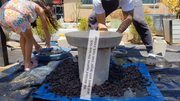
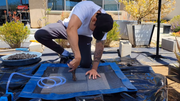
Add decorative stones
Choose black volcanic stone or other suitable gravel and spread it evenly on the surface of the water feature. If gravel is used, be careful to choose a pet screen with a suitable mesh to prevent the gravel from falling and ensure that water can pass smoothly.
Enjoy Your Concrete Water Fountain!